Listing Photos: Sell Faster & Get More Views in 2026
Our property listing photography guide for Aurora sellers covers shots, settings, editing, and sequencing so your Houseup gallery gets more views and buyer messages.

Property listing photography is the art and process of planning, shooting, and editing home images that attract clicks and showing requests. A solid property listing photography guide helps Aurora sellers on Houseup present spaces clearly, drive verified-buyer messages, and move from first view to scheduled tours faster and with more confidence.
By Vinay Sandhu · Last updated: April 23, 2026
At a Glance
This guide shows you how to plan, stage, shoot, edit, and publish listing photos that sell. Follow the checklists, settings, and sequencing tips tailored for Houseup so your gallery earns more views, verified-buyer messages, and tours within the first 24–48 hours of going live.
- What you’ll learn: equipment basics, room-by-room shot lists, camera settings, editing, sequencing, and Houseup workflows.
- Who it’s for: Canadian homeowners and landlords listing on Houseup, plus pros supporting sellers and rentals.
- Why it matters: buyers skim photos first; clear, bright images increase click-throughs and scheduled viewings.
- Contents quick-jump:
- What it is · Why photos matter · How it works · Complete walkthrough
- Types/approaches · Best practices · Tools/resources · Camera settings
- Smartphone vs camera · Optimize for Houseup · Mistakes · 13 gallery ideas · Case studies · FAQ
What is property listing photography?
Property listing photography is a structured workflow—staging, lighting, composition, capture, and editing—that helps buyers grasp layout, light, and finishes at a glance. The goal is simple: more quality views, more messages from verified buyers, and more scheduled tours with minimal back-and-forth.
Think of your gallery as a product demo. It should explain the home in 20–30 frames: where it is approached, how living spaces connect, why the kitchen works, and what the backyard offers. In our experience working with Canadian sellers on Houseup, a logical front-to-back sequence reduces confusion and increases save rates the same day you post.
- Typical gallery order: front exterior, entry, living, kitchen, dining, primary bed/bath, secondary beds/baths, basement/office, laundry, backyard, bonus/twilight.
- Target consistency: straight verticals, even color across rooms (3000–4000K), and natural, honest brightness.
- Time-on-listing cue: buyers often decide to message by photo 6–10 when the flow is clear.
Why great listing photos matter
Great listing photos increase clicks, saves, and showing requests. Bright, well-composed images keep buyers on your page longer, elevate perceived value, and reduce objections—leading to more verified-buyer messages and faster booking of viewing slots.
Photos are the thumbnail pitch. Even small adjustments—decluttering, straightening lines, fixing white balance—produce immediate gains. On mobile, where most Houseup browsing happens, galleries with 20–30 crisp images tend to outperform thin sets. A single twilight exterior can lift save rates because it pops in feeds during evening browsing.
- Engagement levers: hero image quality, gallery length (20–30), consistent color, clear room flow.
- Friction sources: clutter, mixed bulbs (cool + warm), crooked verticals, and “mystery rooms” without context.
- Speed signals: replying to messages within minutes keeps momentum and converts interest into tours.
How property listing photography works
The core workflow: prep and stage, plan a room-by-room shot list, lock simple camera settings, shoot wide-and-straight, capture 3–5 details, edit for natural color, then publish with a logical sequence. Consistency across images builds trust and drives viewing requests.
Use a checklist so nothing slips when you’re under time pressure. Five minutes spent on staging can save you twenty in editing, and clear sequencing saves buyers seconds per photo—adding up to more time-on-listing.
- Pre-inspect (10–15 min): Open blinds, test lights, note bulb color; list eyesores to move.
- Declutter sweep: Clear counters, stash cords, remove bath items, thin fridge magnets, align chairs.
- Gear prep: Tripod at ~4.5 ft; lens 16–24mm (full-frame) or 10–16mm (APS‑C); bubble level the head.
- Baseline settings: f/7.1–f/8, ISO 100–400, 1/60s on tripod for ambient; bracket windows if needed.
- Framing: Two wides per room; shoot from doorway and a corner; keep verticals straight.
- Detail cutaways: 35–50mm for hardware, fixtures, millwork; 3–5 details per listing.
- Blue hour exterior: 10–20 minutes after sunset; all lights on; ISO 100–200; 1–4s exposures.
- Edit and sequence: Correct white balance, straighten, lens-correct, then order front-to-back.
Property listing photography guide: complete walkthrough
Follow this end-to-end walkthrough to plan, shoot, and publish a professional-quality gallery. You’ll use simple settings, keep color consistent, and sequence photos so buyers understand the layout quickly and feel confident booking a tour on Houseup.
Pre-shoot prep (30–45 minutes)
- Lighting check: Replace odd bulbs; aim for 3000–4000K throughout to avoid color shifts.
- Window strategy: Clean glass; schedule rooms when their windows aren’t in harsh sun.
- Surface reset: Counters clear except one accent; smooth linens; neutral towels in baths.
- Cable control: Tuck and tape; hide power bars; unplug chargers in visible outlets.
- Safety scan: Cover floor vents, move small rugs, and secure loose cords to prevent trips.
Shooting plan (room by room)
- Front exterior: Cars out, bins hidden; 35–50mm for natural perspective; 2–3 angles.
- Entry: Shoes/coats away; one wide from living side and one detail of stairs or hardware.
- Living: Fluff pillows; TVs off; two wides (doorway + corner) and one vignette.
- Kitchen: Clear counters; 4–6 frames (overall, island, appliances, eating nook).
- Dining: Aligned chairs; single centerpiece; 1–2 angles maximum.
- Primary suite: Symmetry matters; two wides and one detail of fixtures or textures.
- Baths: Lids down; bottles out; 1 wide + 1 vertical detail of shower/vanity.
- Office/basement: Brighten with lamps; frame corners to suggest space without distortion.
- Backyard: Cushions out; grill cleaned; 2–3 frames with seating area in foreground.
- Twilight: Blue-hour hero shot with every light on; include walkway/landscape lighting.
Editing and delivery
- White balance first: Sync WB across rooms; keep wood tones natural.
- Geometry: Fix lens distortion and straighten verticals before local adjustments.
- Windows: Protect highlights; gentle HDR or flash/ambient blending beats crunchy merges.
- Final pass: Remove sensor dust, minor scuffs, and hot pixels; avoid altering permanent features.
- Sequence: Front exterior → entry → main living spaces → private rooms → amenities → backyard → twilight.
Types, methods, and approaches
Choose a capture style based on room size and window brightness: Ambient-only (fast, natural), Flash bounce (clean color), HDR/bracketed (window control), or Hybrid (flash + ambient). Consistency across the gallery matters more than the method you pick.
Approach quick picks
- Ambient only: Works well on overcast days and small rooms; risk of window blowout.
- Flash bounce: On- or off-camera; bounce into ceiling/wall for neutral color and crisp detail.
- HDR/Bracketing: 3–5 exposures (–2 to +2 EV); keep merges subtle and walls smooth.
- Hybrid blend: One flash frame plus ambient base; mask highlights for natural windows.
Specialty add-ons
- Virtual staging for vacant rooms; keep scale realistic and lighting believable.
- 360° tours with a simple floor plan; helpful for larger or multi-level homes.
- Drone exteriors where permitted; highlight lot lines and neighborhood context.
- Detail vignettes (hardware, millwork, views) that support premium positioning.
Best practices for photos that sell
Keep lines straight, colors neutral, and rooms decluttered. Shoot at chest height, avoid extreme wide distortion, and lead your gallery with curb appeal. Honest, consistent images reduce buyer hesitation and increase messages from verified buyers.
Room-by-room checklist
- Exterior: Remove cars; hide bins; sprinklers off; 2–3 angles at 35–50mm.
- Entry: Shoes/coats away; lights on; wide + one feature detail.
- Living: Align art; fluff pillows; two wides + one vignette.
- Kitchen: One accent max on counters; 4–6 frames; hide soaps/sponges.
- Dining: Chairs aligned; one centered wide.
- Primary bed: Symmetry; smooth linens; two wides + detail.
- Bath: Lids down; bottles out; one wide + one vertical detail.
- Backyard: Mow lawn; set cushions; 2–3 frames including deck/patio.
Color and light consistency
- Target 3000–4000K indoors so bulbs match daylight and wood tones look natural.
- Replace mismatched bulbs; turn off color-casting lamps that add green/magenta.
- Lock a manual white balance or calibrate with a gray card; sync across similar rooms.
Gallery sequencing that converts
- Lead with a strong front exterior or a stunning living/kitchen angle.
- Group similar spaces; avoid jumping floors or mixing private rooms with living spaces.
- Close with amenities and a twilight exterior to leave a strong final impression.
Tools and resources (Houseup + pro gear)
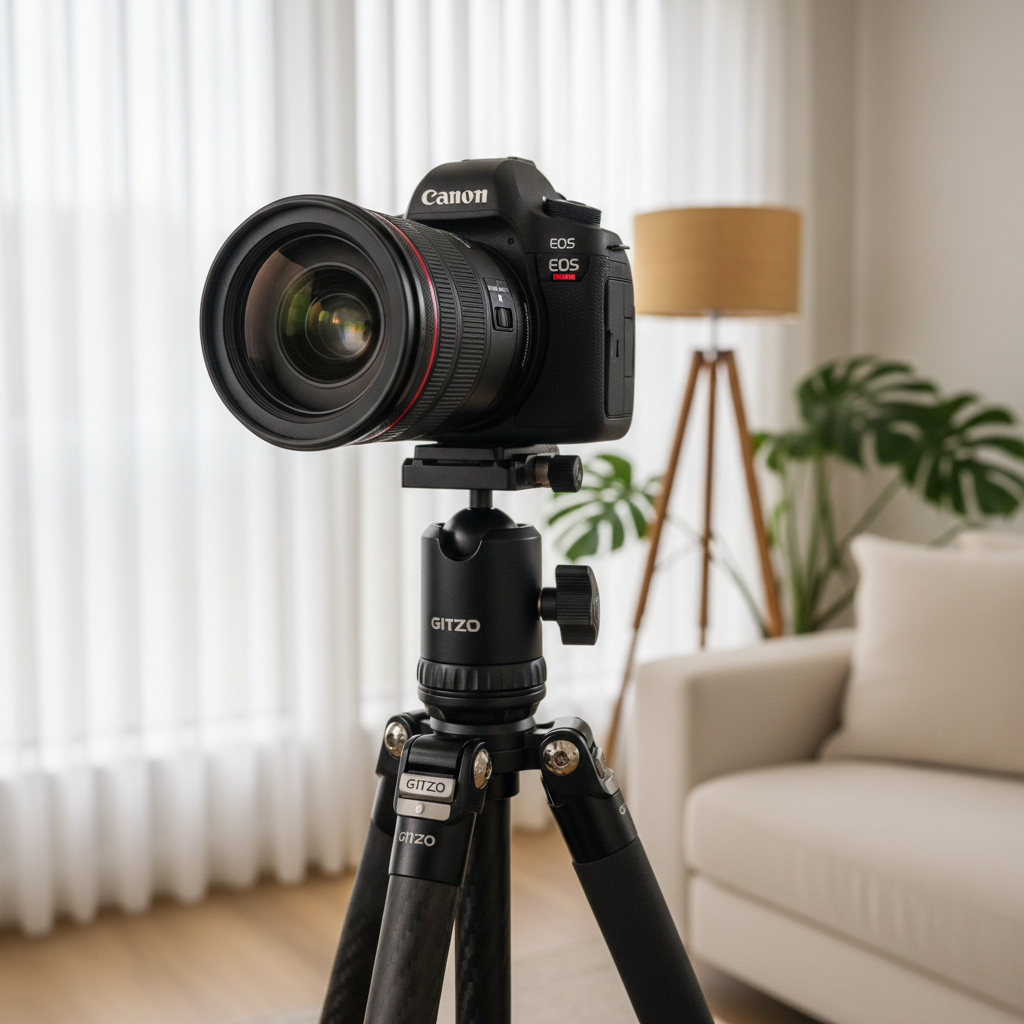
Pair a simple, reliable capture kit with a streamlined publishing stack. A wide-angle lens, sturdy tripod, and single speedlight cover 90% of interiors. Houseup’s listing, messaging, scheduling, and legal tools turn those photos into verified-buyer tours and secure closings.
Capture kit (practical picks)
- Camera: Any modern mirrorless/DSLR with manual control; 24MP RAW is plenty.
- Lenses: 16–35mm (full-frame) or 10–20mm (APS‑C) for rooms; 35–50mm for details.
- Tripod: Mid-weight with a bubble level; quick-release plate for speed.
- Lighting: One speedlight or small strobe; radio trigger; collapsible reflector.
- Accessories: Microfiber cloths, gaffer tape, spare bulbs, window cleaner, extra batteries.
Planning and checklists
Photography is smoother with a written plan. A one-page room-by-room sheet saves minutes in each space and prevents gaps in the final gallery.
Creative brief and consistency
Before you shoot, write a one-paragraph creative brief: the home’s three selling points, lighting approach, and the intended hero image. As Shopify’s creative brief guide notes, a clear brief aligns execution and speeds editing because decisions were made upfront.
Editing workflow
- RAW processor: Enable lens profiles; use transform tools; sync white balance by room type.
- HDR merge: Keep local contrast modest so walls remain smooth.
- Retouching rule: Remove dust/scuffs, not permanent features; accuracy builds trust.
Houseup workflow (publish and convert)
- Create your listing once and distribute across Canada’s leading real estate networks from one dashboard.
- Message verified buyers directly while interest is highest; answer specifics fast.
- Offer viewing slots buyers can claim in-app; hold times keep momentum.
- Use ready-to-use contracts with legal guidance to move from offer to close securely.
- Lean on 24/7 support for a second opinion on sequencing, captions, or disclosure order.
For creators who add short-form video, templates help. See Shopify’s video brief to plan quick walkthroughs that complement the photo gallery and improve time-on-listing.
Camera settings and technique (fast formulas)
Use simple, repeatable settings: interiors at f/7.1–f/8, ISO 100–400, 1/60s on a tripod; details at f/4–f/5.6; exteriors at f/8, ISO 100. Lock white balance, straighten verticals, and bracket bright windows to protect highlight detail.
- Interiors baseline: 16–24mm, f/7.1, ISO 200, 1/60s; two angles per room.
- Details: 35–50mm, f/4–f/5.6; watch reflections in chrome and glass.
- Exteriors daylight: 24–35mm, f/8, ISO 100, 1/125s; polarizer to tame glare.
- Blue hour: ISO 100–200, 1–4s on tripod; every house light on for a glow.
- Flash blend: Low-power bounce into ceiling/wall; mix with ambient for neutral color.
Smartphone vs camera: what’s best for listings?
Smartphones can work for rentals and small rooms in good light. Dedicated cameras with wide lenses and flash produce straighter lines, cleaner color, and sharper detail for sale listings. If selling, prioritize a real lens, tripod, and consistent white balance.
| Option | Strengths | Limitations | Use For |
|---|---|---|---|
| Smartphone (ultra-wide) | Fast, built-in HDR, easy sharing | Distortion, noise in low light, limited flash control | Rentals, small rooms, quick refreshes |
| DSLR/Mirrorless + wide lens | Straight lines, low noise, lens choices | More setup time, needs tripod | Most home sales listings, larger spaces |
| Hybrid (phone + mini light) | Portable, better color than phone-only | Mount quirks, learning curve | On-the-go extras |
Optimizing for Houseup search and feeds
Lead with a compelling exterior, follow with room-to-room flow, and keep captions factual. Upload 20–30 photos, tag amenities, and respond to verified-buyer messages quickly—the first hour after publishing is critical for engagement and saved listings.
- Hero image: Front exterior or a standout living/kitchen angle; avoid cars and clutter.
- Count: 20–30 photos balance depth and speed; 5–7 for main living/kitchen combined.
- Captions: State materials and dimensions; skip hype that invites doubt.
- Response time: Replies within minutes convert interest into booked showings.
Local considerations for Aurora
- Winter light is brief; plan interiors late morning and blue-hour exteriors 10–20 minutes after early sunsets.
- Spring thaw can track in mud; place mats and shoot main floors first before foot traffic marks floors.
- Evening browsing is common; publish weekday evenings when commuters are ready to message.

Common mistakes to avoid
The top mistakes are crooked verticals, mixed color temperatures, and clutter. Others include overcooked HDR, mirrors revealing the shooter, and galleries that jump between rooms with no logical flow. Fix these and your photos will immediately look more professional.
- Crooked lines: Use transform tools and tripod levels; tilt is an instant trust-killer.
- Color casts: Standardize bulbs; turn off odd lamps adding green/magenta.
- Clutter: One accent beats ten trinkets; floor space should look walkable.
- Over-HDR: Keep merges gentle; natural beats crunchy.
- Reflections: Step aside; angle mirrors to avoid showing the camera.
- Random order: Sequence front-to-back; group similar spaces together.
13 gallery ideas buyers love
Use these 13 shot ideas to give depth without bloat. They highlight flow, light, and finishes—helping buyers imagine living there and pushing them to book a viewing slot on Houseup.
- Front exterior at golden hour (natural perspective, no cars).
- Entry with sightline to living space.
- Living room wide from doorway.
- Living room corner showing seating layout.
- Kitchen wide with island and appliances.
- Kitchen detail: hardware or backsplash.
- Dining room centered with aligned chairs.
- Primary bedroom wide with symmetrical nightstands.
- Primary bath wide plus a vanity or tile detail.
- Secondary bed/bath highlights.
- Office or flex space showing window light.
- Backyard with seating foreground and house backdrop.
- Twilight exterior with warm interior glow.
Mini case studies: what changed after better photos
Refreshing photo galleries consistently lifts engagement. When sellers replace dim, tilted, or cluttered images with bright, straight, well-sequenced photos, save rates rise and verified-buyer replies arrive faster—often the same day on Houseup.
- Aurora detached: A new blue-hour exterior and decluttered kitchen set lifted saves and produced same-evening viewing requests.
- GTA condo: Re-shot the living room at 18mm with straightened verticals; verified-buyer messages increased within the first hour.
- Townhome: Added four detail shots (hardware, millwork, fixtures, view) and a logical sequence; more time-on-listing and two back-to-back tours.
Need a second set of eyes? Use Houseup’s 24/7 support for feedback on gallery order and captions, then move from offer to close with ready-to-use contracts and legal guidance—all in one workflow.
Frequently Asked Questions
Quick answers to common questions—from gallery size and timing to editing limits—so you can publish confidently and convert views into tours.
How many listing photos should I upload?
Aim for 20–30 total: 2–3 per key room, 1–2 for smaller spaces, and 2–3 for exterior/yard. This gives depth without fatigue and matches how buyers browse on mobile.
Do I need a wide-angle lens?
Yes for most sale listings. A 16–24mm full-frame (or 10–16mm APS‑C) captures more of the room with straighter lines than a phone. For rentals or tight spaces, phones can work in good light.
When is the best time to shoot exteriors?
Blue hour—roughly 10–20 minutes after sunset—creates an eye-catching glow. For daytime, choose early morning or late afternoon to get softer shadows and richer sky color.
Should I edit out power lines or permanent flaws?
Remove dust or small distractions but don’t alter permanent features. Keep edits truthful to maintain trust and avoid surprises during viewings or negotiations.
Can I shoot everything on my phone?
Phones are fine for rentals and refresh shots in good light. For selling a home, a camera with a wide lens and a tripod typically produces straighter lines, cleaner color, and sharper details.
Conclusion and next steps
Strong listing photos come from a simple system: prep, consistent settings, honest edits, and smart sequencing. Pair that with Houseup’s messaging, scheduling, and legal tools to turn views into verified-buyer tours and secure agreements.
- Key takeaways: Straight lines, neutral color, decluttered rooms, and 20–30 images drive the most engagement.
- Action steps: Build a one-page checklist, schedule shoots by light, pick a hero exterior, and publish.
- Ready? Create your Houseup listing, message verified buyers, and keep momentum with built-in viewing slots and ready-to-use contracts.